

Connecting to the Yoda Network Disk on Windows Using WebDrive
Connecting to the Yoda Network Disk on Windows Using WebDrive
Windows users can use WebDrive to access their data via the Yoda Network Disk, as an alternative to the native WebDAV client and CyberDuck. With WebDrive the Yoda Network Disk can be connected via as a drive in Windows Explorer.
As a VU user you can download a licensed version of WebDrive from download.vu.nl.
Note that you should always disable caching in WebDrive!
Using WebDrive
Start Webdrive from the Desktop icon or the Start menu.

In the initial Window click new.

Choose Secure WebDAV and click Next.

Enter https://data.yoda.vu.nl/ in the Url/Address field.
Enter the Username (an emailaddress). Create a data access password and copy it to the Password field.
You can click Test Connection to see if the credentials are correct.
Click Next

Choose a Drive letter and Connect Now.

You should now see the Yoda Disk in your Windows Explorer.
Disable the cache
By default WebDrive enables a caching mechanism and suggests this as a way to enable syncing and working offline.
This functionality is not implemented very well and you should always disable this to prevent data loss.
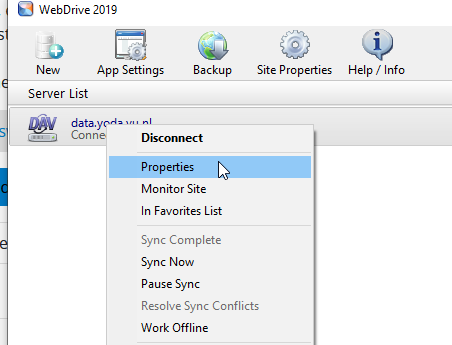
- Right click on “data.yoda.vu.nl” in the server list
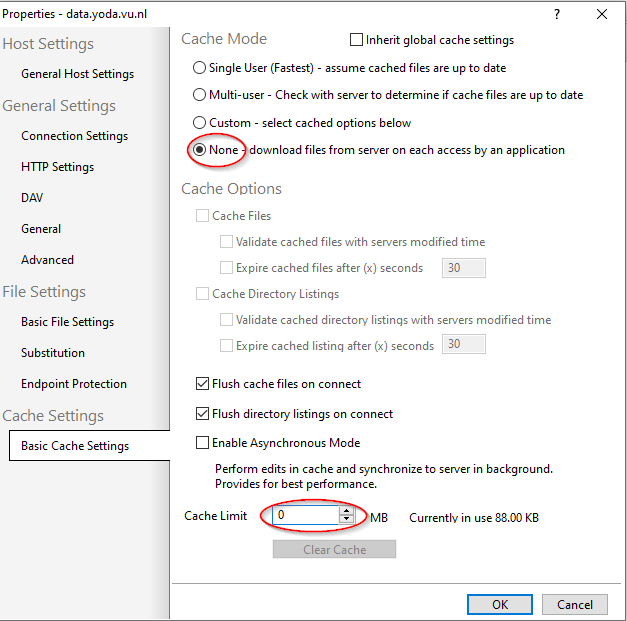
- Set Cache Mode to None and Cache Limit to 0.