Connecting to the Yoda Network Disk using the native Windows WebDAV client.
Connecting to the Yoda Network Disk using the native Windows WebDAV client.
This page explains how to connect to the Yoda Network Disk from a Windows PC using the native WebDAV client.
For most users, Cyberduck is a better alternative. However, the Yoda team recommends using the native WebDAV client if you can’t install Cyberduck, for example if the security settings of your laptop prevent you from installing any new applications.
If you have already configured a mapped network drive and want to update your password, please consult the instructions for updating your password.
Mapping network drive
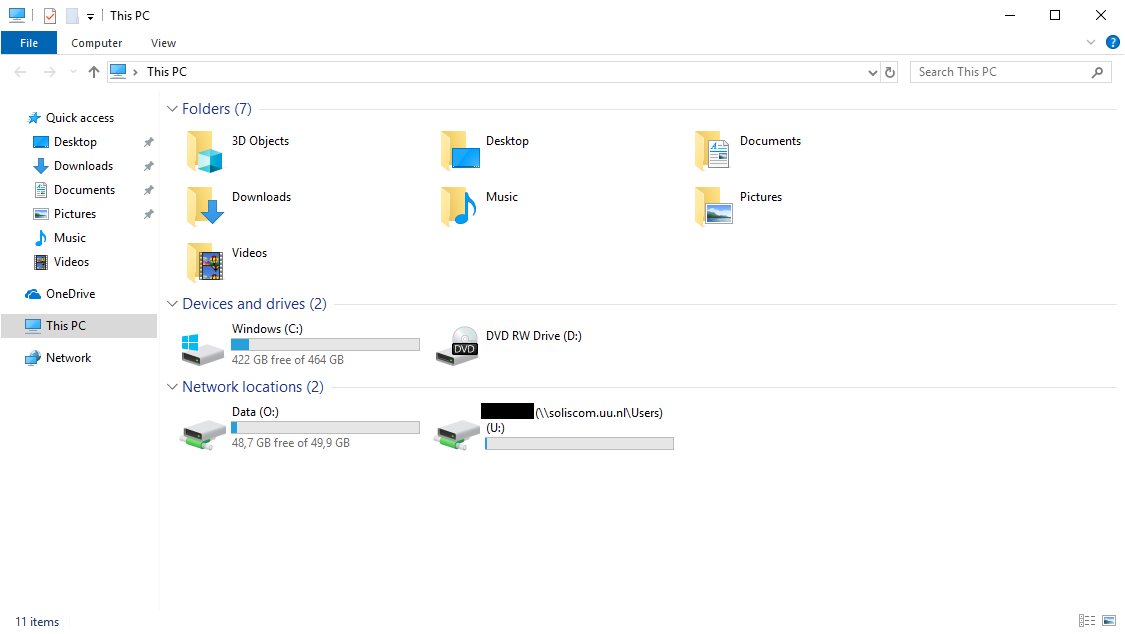
Open “This PC” from the Start menu
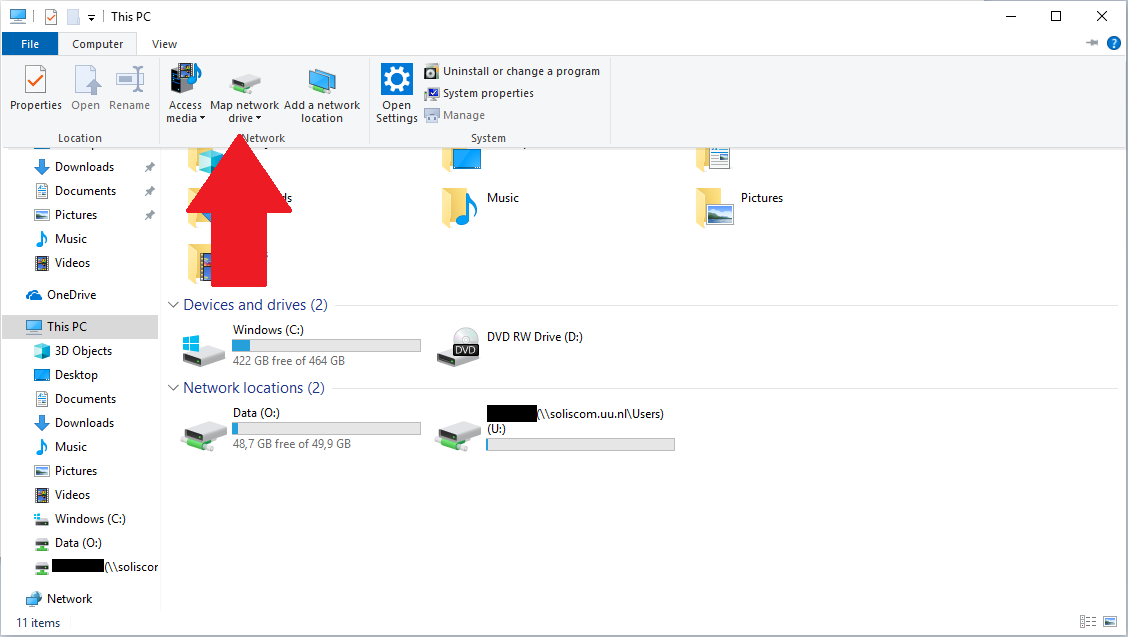
Open the Computer menu item and select “Map network drive”.
Select a drive letter — any free letter is okay. Now enter https://data.yoda.vu.nl/ in the Folder field (see table below).
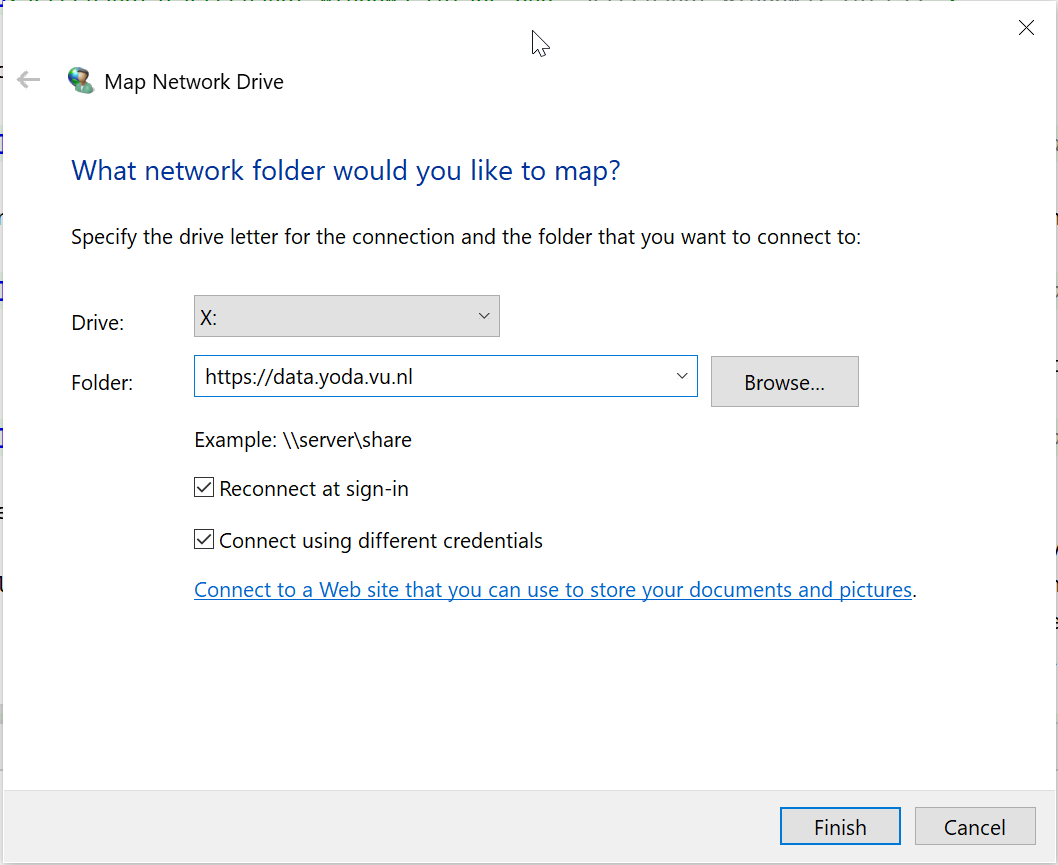
Ensure the box “Connect using different credentials” is checked and click on the Finish button.
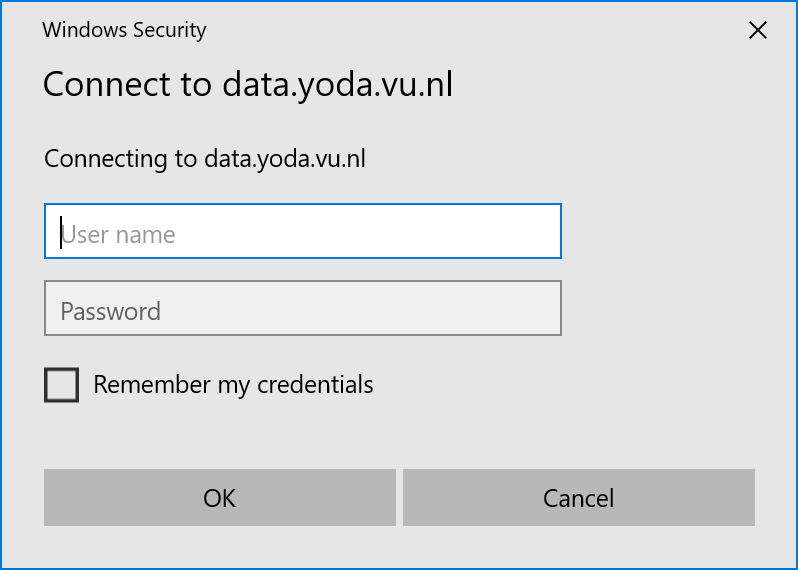
You will be prompted for a name and password. Name is your email address. Create a data access password and copy it to the Password field If you are working on your personal PC or laptop, tick the checkbox “Remember my credentials”.
The Explorer screen will show the folders you have access rights to. You can now drag and drop your files to upload or download them.
Increasing maximum file size
By default, the native WebDAV client on Windows 10 only works with files smaller than 50 MB.
On Windows 11 the limit is set to the maximum 4GB by default.
You can increase the limit on Windows 10 to 4 GB if you have a local administrator account:
- Open the registry editor by pressing the start button, entering “regedit” and pressing the enter key.
- If you are asked whether the registry editor should be allowed to change the system settings, confirm.
- Navigate to key
HKEY\_LOCAL\_MACHINE\SYSTEM\CurrentControlSet\Services\WebClient\Parameters - Open the FileSizeLimitInBytes key
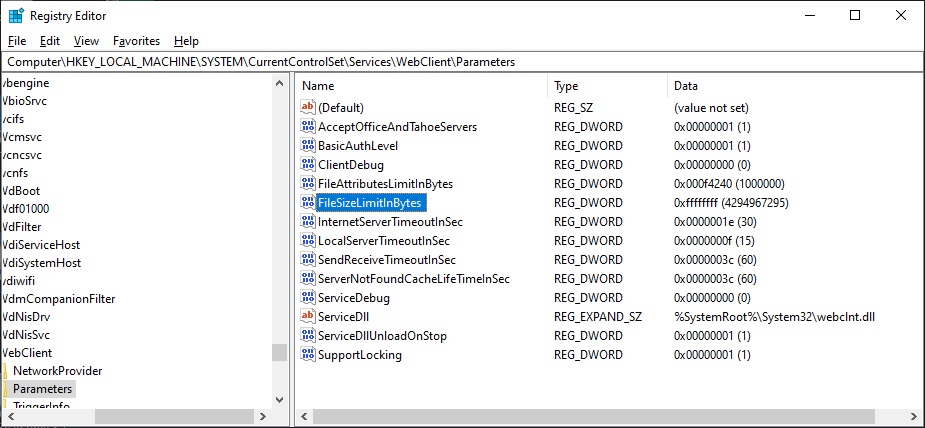
- Set it to FFFFFFFF (hexadecimal)
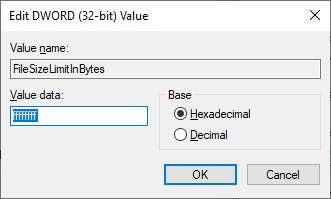
- Click on the “OK” button and close the registry editor
- Restart your computer
Increasing the number of files shown in a folder
By default the native WebDAV client on Windows 10 & 11 will show a folder containing more than 1000 files as empty. If you need to work with larger folders you can increase this limit if you have a local administrator account:
- Open the registry editor by pressing the start button, entering “regedit” and pressing the - enter key.
- If you are asked whether the registry editor should be allowed to change the system settings, confirm.
- Navigate to key
HKEY_LOCAL_MACHINE\SYSTEM\CurrentControlSet\Services\WebClient\Parameters - Open the
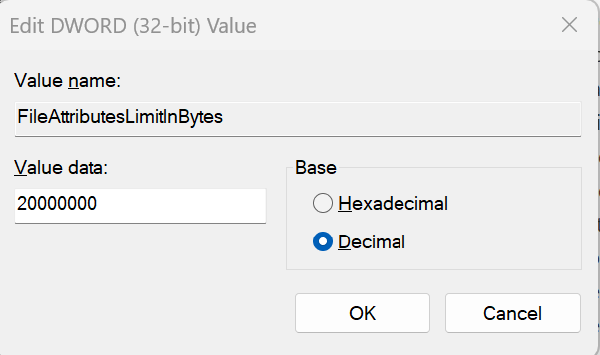
FileAttributesLimitInByteskey: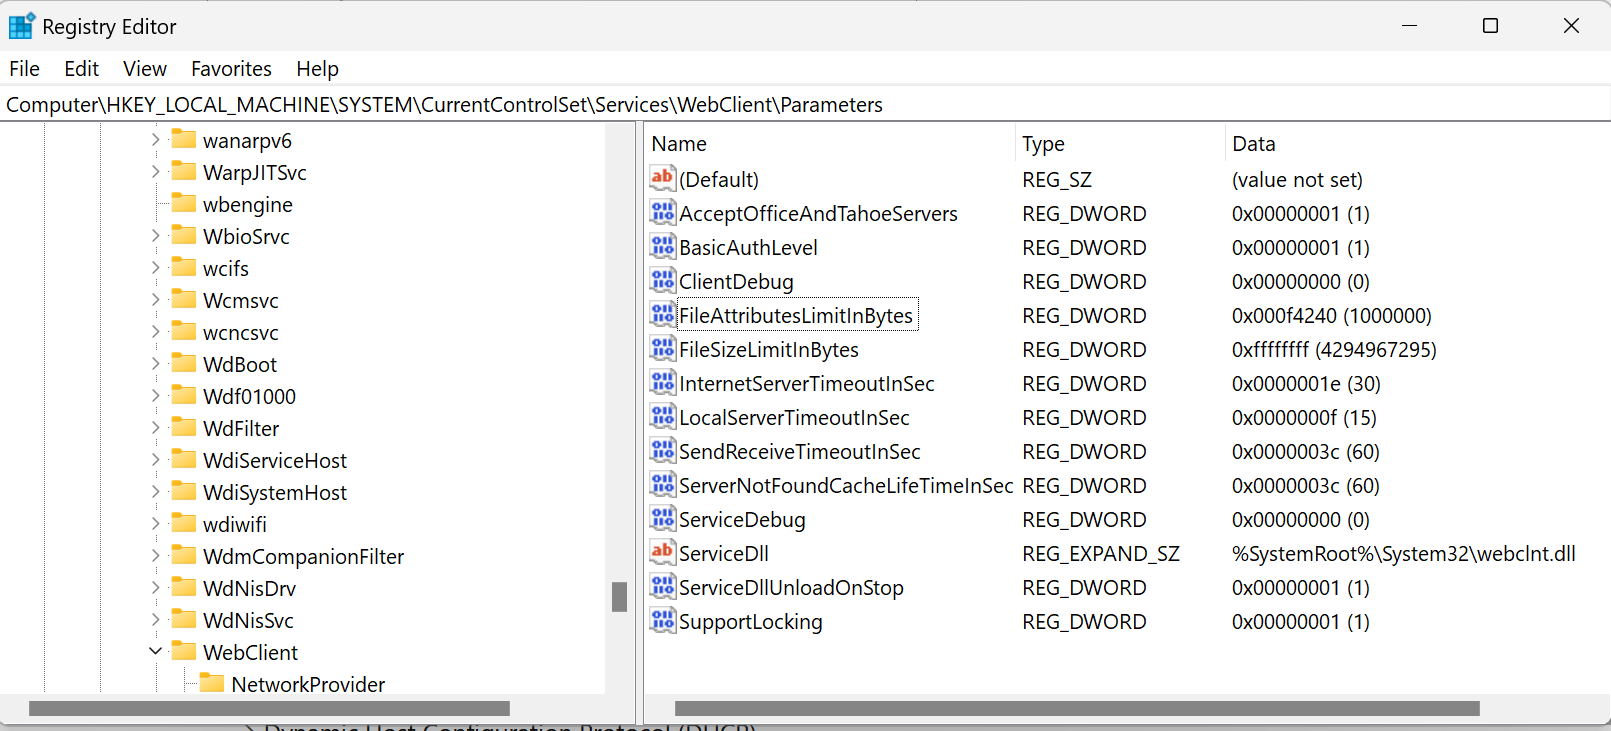
- In the Value data box, type the value that you want to use, and then click OK. For example, if the Web folder contains 20,000 files, type 20000000 in the Value data box.
